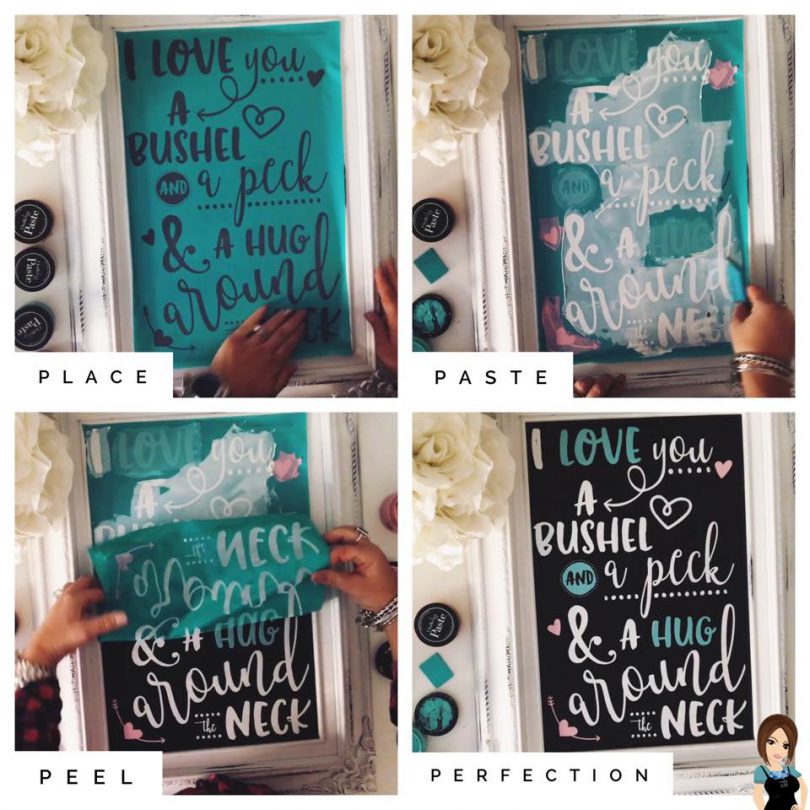
The 3 main things you’ll need to begin a Chalk Couture project is the Chalkology Paste, Chalk Transfer, a Squeegee, and of course whatever surface you’ll be using. Most people think that because you’re using chalk products that it just goes on chalkboards but you can actually use Chalk Couture Products on other surfaces like glass, wood, mirrors, tile, canvas, whiteboards, burlap. painted furniture and more! Awesome, right? We also have Ink which can be used on fabric, apparel, ceramics, and other heat-resistant surfaces.
To get started you’ll want to carefully peel your transfer off the backing sheet…. I recommend “fuzzing” new transfers by placing them on a lint-free cloth or towel and then removing. We have fuzzing cloths that work wonders for this. This step makes it so it’s not super sticky to avoid stretching when you peel off your surface.
Now that you’re ready to use your Transfer, you’ll want to place it on your surface. Press and smooth it out. Then grab some Chalkology Paste (or Ink) in the color(s) you’d like to use. Apply a small amount of Chalkology Paste (or Ink) by spreading it over the design with a Squeegee. You can use multiple colors if you’d like. Once you have all the silkscreen areas covered, just scrape off the excess paste and put it back in the jar. All you need is a thin, even layer…. no need to make it thick and waste any products. You can really make this Chalkology Paste last a long time if you just stick to thin layers. The process is quick. Be sure to not go too slow with applying the Chalkology Paste as you don’t want it to dry on the Chalk Transfer and not go through the screen. If you do by chance leave it on a little too long and feel it’s drying too quickly, just take a little spray bottle and lightly mist it or place a wet paper towel over the top to moisten it back up. Don’t get it too wet though… just mist. After scraping off the excess, peel the Chalk Transfer away while the paste is still wet to reveal the design. Viola!!! It’s like magic!
Now that you’re done be sure to clean your transfer so you can continue to use it again and again. To clean it, you can rinse with water and then just wipe with a board eraser. This helps to remove any chalk residue and keeps the adhesive lasting longer. Then set your Chalk Transfer down flat (sticky side up) to air dry. Once it’s dry, don’t forget to put the backer sheet back on, shiny side to the sticky side of the transfer. And if you’re wanting to use the Chalk Transfer again for another project right away, you can skip putting the backer on and just use a blow dryer to dry both sides.
And you want to know something else? When you’re ready for something else on your chalkboard (or other surface) just take some water and spray it over the design, let it sit for a few minutes, and then wipe it clean with a board eraser or a cloth. So cool!!! I’m telling you this stuff is awesome. You have to try it!!

